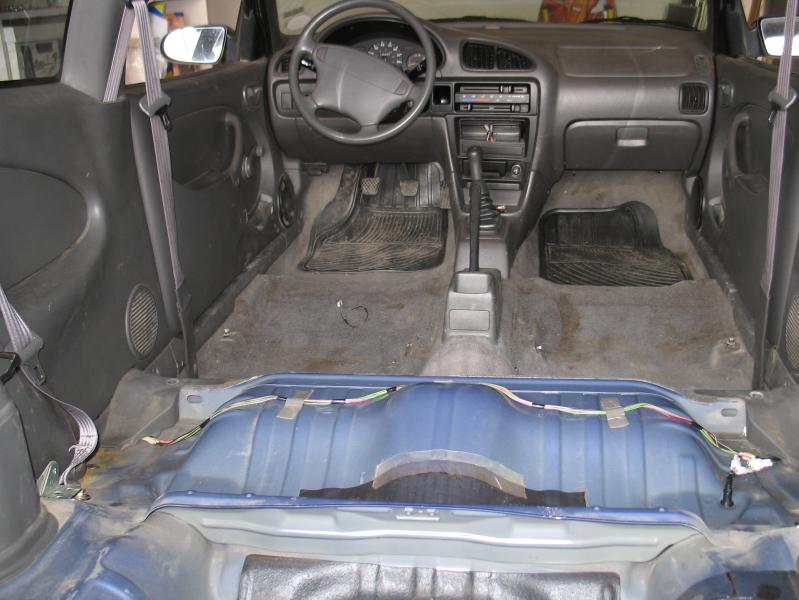
 ...Just a matter of unbolting the front seat rails, and rear seat, and a quick vacuum. I did take pictures of the seat belt setup and a few others along the way...
I could have been quicker, but I took a little time to remove the center console because I wanted to evaluate whether I could put the circuit breaker under the floor and have the switch just under the parking brake. It WOULD be possible, but require considerable fabrication of a junction box, and I didn't like the wiring layout as much as I wouldn't be able to interupt both the most + and most - cables very gracefully. I did NOT remove 'everything', or tear apart the dash...
 3/22/2009 - after being on the road for a couple weeks, I decided to add a little padding and cover to the back seat.... and might come back and do the whole floor just for fun.
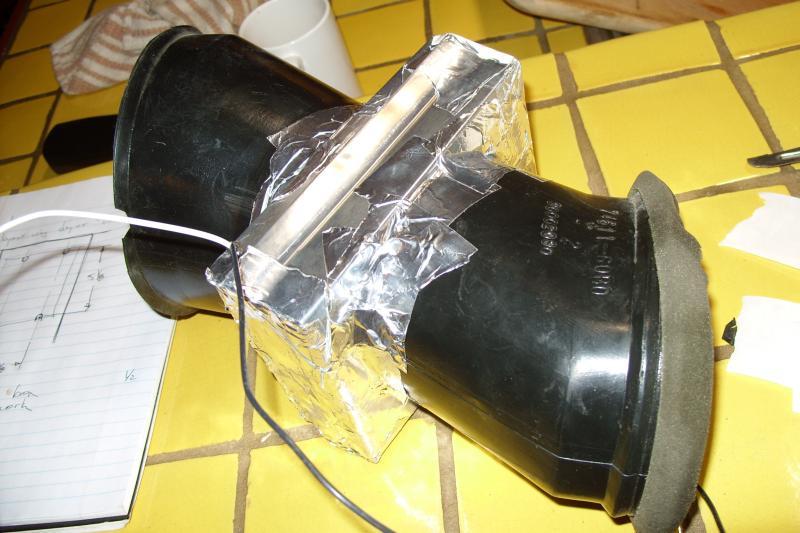
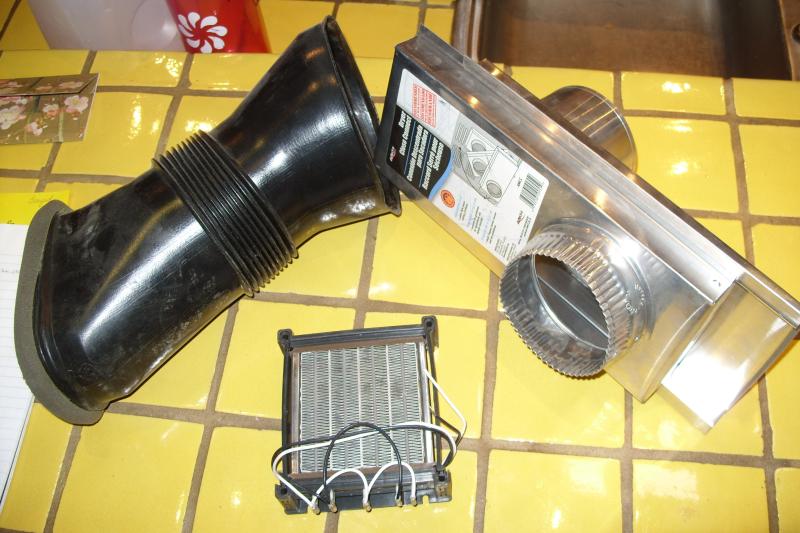 11/04/2009 - after putting it off all summer.... time to install the heater! It turned out to be pretty quick to insert the ceramic heater core into a dryer vent, and wedge it in the middle of the fan ductwork. I was able to tap into the fan power to trigger the heater switch which closes the HV circuit to power the heater. This way I can be sure that the heater only comes on when the fan is running so the ductwork doesn't get too hot. Turns out that it really doesn't get too hot at all; the air coming out the vents seems about the same as a standard system... warm, but not really 'hot'.
 The installation went well...but the fuses (20amp, 250v slo-blo) kept blowing. I went round nd round thing that perhaps my fabriction of the switch was faulty with the diode backward or something, but it turned out fine. I suspect that at 96v my particular heater core pulls just over 20amps when it first comes on, but have not verified this as I do not have a DC clamp to measure the amps accurately. Out of frustration I finally installed single strands of 22ga wire instead of fuses until I can borrow a meter to see what is actually needed.
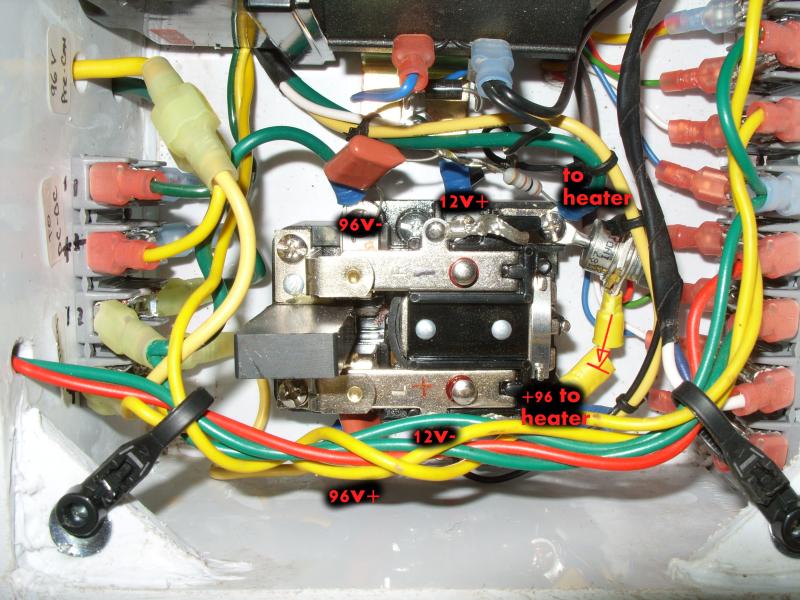
...and closeup of the heater relay in place.